5 Easy Steps to a Warmer Winter
For a mere $30, you can essentially shrink wrap your windows to keep out drafts and decrease your home heating bill. This is our second year doing this, and we have certainly noticed the difference. It is quite simple to do, and you can easily do it in an evening. Your kids can even help! Well, ages 8 and up at least 🙂 Here is a quick step by step tutorial to a warmer winter:
1. Measure the area you want to seal off. The rolls of plastic that we purchased were folded, so we didn’t have a problem with size. It will even comfortably cover patio doors. Make sure you allow for a little extra, just in case. Cut the plastic accordingly.
2. Put the provided double sided tape around the window. We have not had problems removing the tape (i.e. pulling off paint) 6 months later, but test a small area first, just to be sure. Make sure you create a seal by overlapping the tape at the corners.
3. Put up the plastic while trying to keep it as flat as possible. My husband did this by himself last year, so it is doable if you’re going solo, but it is certainly helpful to have a second pair of hands. Word of advice: do the top first, then slowly go down the sides. Don’t press too firmly until you are sure you’re happy with how it looks. Don’t worry if it isn’t flat, that will happen. When you are happy, press the plastic firmly to the tape. *Please note that when you put up the plastic, if you have blinds, you won’t be able to adjust them until you remove the plastic. You will need to chose how you you would prefer to have them for the duration of the cold months. We chose open, because we have drapes to cover the window, as well.
4. Heat up the plastic using a hairdryer. As you heat up the plastic, you will notice it starting to become taut. As it stretches, you will start to notice ripples. Simply heat the area, and they will disappear. The more diligent you are in this step, the better the final outcome – you will barely even notice it there. When we had the plastic over our bedroom window last year, I repeated went to move the blinds so that I could look out to our backyard, but was stopped short. You honestly won’t notice it.
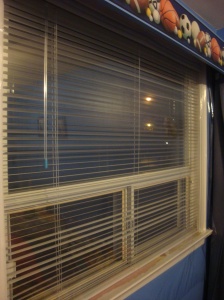
5. Lastly, simply trim off the excess plastic – it comes with a cutter, so this should be straightforward. Don’t get too close to the edge, though. As you can see, you can barely tell that there is anything over the window. Be sure to tell your children not to poke the plastic – if you get a hole in it, it will defeat the purpose.
Here’s to a warm winter, and a lower heating bill! Do you have any money saving tips that can be accomplished through simple home adjustments?


Hi Liz. Great idea. Do you think this will work on skylights?
| Posted 12 years, 3 months agoI think it would as long as you have a smooth surface to put the double sided tape on. Try it and let us know! 🙂
| Posted 12 years, 3 months agoi heard about this one. finally able to see it done. where did you buy those plastic?
| Posted 12 years, 3 months agoWe bought ours at Home Depot, but you can get it at any home improvement store.
| Posted 12 years, 3 months ago